Applying makeup can sometimes be a stressful job. But what are the best rules to follow when it comes to putting it on our faces? Sometimes we overthink and we forget how easy and fun it is to do.
Do you ever wonder if you are applying your makeup like a pro?
Take a look at what our experts recommended when going about your makeup routine. We have simplified this process from a start to an incredible finish. Keep an eye on the following steps next time you plan on applying your makeup.
STEP 1 – Prepare your skin
If you know that you’re going to wear a lot of makeup all day, we recommend preparing your skin for it. Even if you think your skin can handle it, this is the best approach.
USE A SKIN EXFOLIANT
-Will leave your skin looking brighter.
-It will improve the effectiveness of your skincare products by enhancing absorption.
-Prevents clogging pores.
-In the long term, it will increase collagen production.
USE A FACIAL MASK
-Cleanses the pores.
-Moisturize and hydrate the skin.
-Regular use can reduce wrinkles, brown spots, and other signs of aging.
-Diminish hyperpigmentation and firming skin.
STEP 2 – Apply the primer
Primer’s main purpose is preparing the skin for the application of the foundation. It offers a proper background for the other products to get absorbed easier.
-Makeup longevity.
-Get rid of the oily glow.
-Smoothing and evening the skin.
-Fill in the lines, wrinkles, and other imperfections of your skin.
-Substitute for a highlighter/Give a brighter look.
STEP 3 – Apply the foundation
Applying foundation is a way to cover the skin and improve its appearance. With the foundation, you can hide the fine lines and wrinkles.
-A protective barrier over the skin.
-Protection against sun damage and other pollutants.
-Complement your skin type.
STEP 4 – Apply the concealer
The concealer goes hand in hand with the foundation to provide extra coverage. It brightens up your face and draws attention to your eyes.
-Smooth and even skin tone appearance
-Refreshes tired-looking eyes
-Hide skin imperfections and blemishes
-Lighten dark areas
STEP 5 – Apply the highlighter
The highlighter balances the brightness illusion created on the face.
-Look more youthful.
-Higher looking cheekbones.
-Eyes look bigger and brighter.
-Brow lift.
-Plumper-looking lips.
STEP 6 – Apply blush
The blush will give your face a bloom of color. It gives your face liveliness, otherwise, foundation all over the face may make you look pale. You can use a darker shade for contouring which gives your face a definition.
-Call attention to specific features
-Natural skin look
-Add a pop of color to your face
-Look more fresh and youthful
STEP 7 – Fill in your brows
You now can define the start and the end of your brow with a few strokes. Create hair-like strokes until you think it’s even. After defining the brow, fill in the little areas.
STEP 8 – Apply the eye shadow
Go with the concealer over your lids to set with the foundation. It will help the eye shadow to go on a lot smoother. Apply the shadows of your choice to the lids and below the lash line.
Use a blending brush to shade into the crease and blend outward. Don’t push too hard because you will put too much product down. Too much product will be harder to blend. You want your shadow to build. That’s why we recommend starting with a lighter shade than building to the darker ones.
STEP 9 – Apply the lashes or mascara
APPLY THE LASHES
You can now apply your favorite lashes. Use lashes that give your eye shadow underneath a chance to shine.
APPLY THE MASCARA
Mascara is accentuating the lashes, adding thickness, length, and color to the lashes.
-Draws attention to the eyes and creates definition.
-Curl, thicken and volumize your lashes.
-Give a complete look to your makeup.
STEP 10 – Apply the lipstick
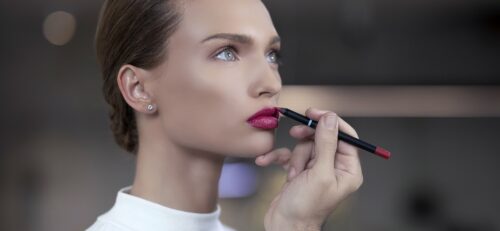
First, add the contour to your lips with a lip liner. That will make your lips bolder and attractive.
-Lips look bigger and fuller.
-Change the shape of your lips.
-Plumper-looking lips.
-Prolong the use of lip colors.
